Introduction
Light, airy, and bursting with tropical sunshine, these Pineapple Angel Food Cupcakes are a delightful twist on a classic dessert. Angel food cake is renowned for its cloud-like texture, achieved by whipping egg whites into stiff peaks, creating a fat-free sponge that’s both delicate and satisfying. We’ve taken this beloved foundation and infused it with the bright, juicy flavor of pineapple, transforming it into individual, perfectly portioned cupcakes that are simply irresistible.
What makes these cupcakes truly special is their incredible moistness and vibrant taste, a direct result of incorporating pineapple. The natural sweetness and acidity of the fruit complement the subtle vanilla notes of the angel food cake beautifully, creating a harmonious flavor profile that transports you straight to a beachside paradise. They’re an ideal dessert for any occasion, from casual gatherings to elegant celebrations, offering a lighter alternative to heavier cakes without sacrificing an ounce of flavor or elegance.
Beyond their exquisite taste, these Pineapple Angel Food Cupcakes are surprisingly easy to make, making them a perfect project for both seasoned bakers and beginners alike. The individual serving size makes them convenient and appealing, and their ethereal texture and tropical essence will leave everyone asking for the recipe. Prepare to fall in love with these little clouds of pineapple perfection!
Nutritional Information
Per serving (approximate values):
- Calories: 180
- Protein: 4g
- Carbohydrates: 40g
- Fat: 0.5g
- Fiber: 1g
- Sodium: 150mg
Ingredients
- 1 ½ cups granulated sugar, divided
- 1 cup cake flour, sifted
- 1 ½ cups egg whites (from 10-12 large eggs), at room temperature
- 1 ½ teaspoons cream of tartar
- ¼ teaspoon salt
- 1 teaspoon vanilla extract
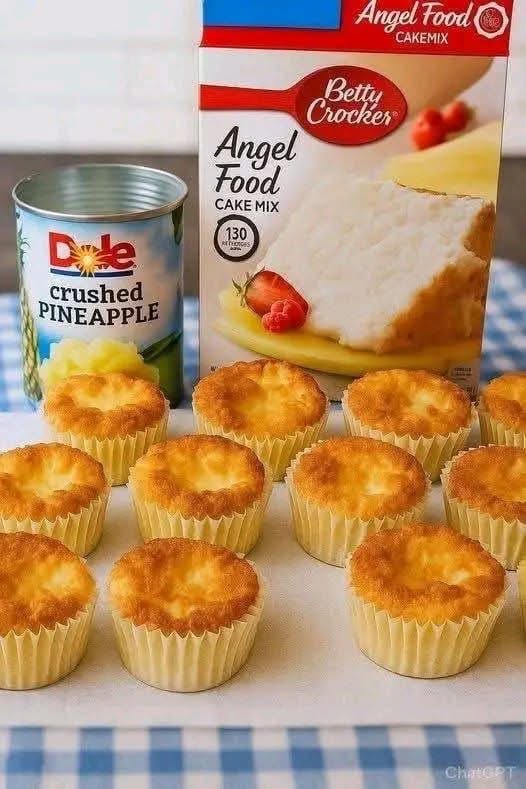
- 1 (8-ounce) can crushed pineapple, well drained (reserve 2 tablespoons juice for glaze, if making)
- Optional Glaze: 1 cup powdered sugar, 2 tablespoons reserved pineapple juice or milk, ¼ teaspoon vanilla extract
- Cupcake liners
Instructions
- Preheat your oven to 350°F (175°C). Line a 12-cup muffin pan with paper cupcake liners.
- In a small bowl, whisk together 1 cup of the granulated sugar and the sifted cake flour. Set aside. Sifting the cake flour is crucial for a light and airy texture, preventing lumps and ensuring even distribution.
- In a very clean, large mixing bowl (preferably glass or metal, as plastic can retain grease), add the egg whites. Ensure there is absolutely no trace of yolk, as fat will prevent the egg whites from whipping properly.
- Using an electric mixer on medium speed, beat the egg whites until they become foamy.
- Add the cream of tartar and salt to the egg whites. Continue beating on medium-high speed. The cream of tartar helps stabilize the egg whites, allowing them to achieve greater volume and maintain their structure.
- Gradually add the remaining ½ cup of granulated sugar, one tablespoon at a time, while continuing to beat the egg whites.
- Increase the mixer speed to high and beat until the egg whites form stiff, glossy peaks. This means when you lift the beaters, the peaks stand up straight and hold their shape. Do not overbeat, as they can become dry and crumbly.
- Gently fold in the vanilla extract into the whipped egg whites using a rubber spatula.
- Now, add the drained crushed pineapple to the egg white mixture. Fold it in very gently, taking care not to deflate the egg whites. This step adds moisture and flavor.
- Next, gradually add the flour and sugar mixture to the egg white mixture, about ¼ cup at a time. Using a rubber spatula, gently fold the dry ingredients into the wet ingredients. Use a cutting and folding motion, turning the bowl as you go, until just combined. It is paramount not to overmix, as this will deflate the egg whites and result in a dense cupcake. The batter should still be light and airy.
- Divide the batter evenly among the prepared cupcake liners, filling each about two-thirds full.
- Bake for 18-22 minutes, or until the tops are golden brown and a wooden skewer or toothpick inserted into the center of a cupcake comes out clean. Angel food cakes are delicate, so avoid opening the oven door too frequently during baking.
- Once baked, immediately invert the muffin pan onto a wire rack or place the cupcakes upside down on the neck of a bottle (if using a traditional angel food cake pan method, this prevents collapse). For cupcakes, simply invert the entire pan for a few minutes. This step helps to prevent the cupcakes from collapsing and maintains their airy structure.
- After a few minutes, carefully remove the cupcakes from the inverted pan and place them right side up on a wire rack to cool completely. Cooling completely before glazing or serving is essential for the best texture and to prevent the glaze from melting.
- If making the glaze: In a small bowl, whisk together the powdered sugar, reserved pineapple juice (or milk), and ¼ teaspoon vanilla extract until smooth. Drizzle over the cooled cupcakes.
- Serve and enjoy your light and delicious Pineapple Angel Food Cupcakes!
Cooking Tips and Variations
Achieving the perfect angel food cupcake relies heavily on the proper handling of egg whites. Always use fresh egg whites, preferably at room temperature, as they whip up to a greater volume. Ensure your mixing bowl and beaters are impeccably clean and grease-free; even a tiny speck of fat can prevent the egg whites from reaching stiff peaks. When incorporating the dry ingredients and pineapple, the key is gentle folding. Use a rubber spatula to cut through the center of the batter and then fold it over, rotating the bowl as you go. This preserves the air bubbles that give angel food cake its signature lightness. Do not stir or beat the mixture once the dry ingredients are added.
For variations, you can experiment with different fruits. Finely diced mango or pureed peaches (well-drained) would offer a lovely alternative tropical flavor. For a citrusy twist, add a teaspoon of lemon or lime zest to the batter. Instead of a simple glaze, you could top these cupcakes with a dollop of freshly whipped cream and a sprinkle of toasted coconut flakes for added texture and flavor. A light cream cheese frosting, thinned slightly, would also be a delicious addition. For an extra special presentation, garnish with a small wedge of fresh pineapple or a maraschino cherry. Remember that angel food cake is naturally fat-free, so be mindful of your toppings if you want to maintain a lighter profile.
Storage and Reheating
Pineapple Angel Food Cupcakes are best enjoyed the day they are baked, when their texture is at its peak lightness and airiness. However, they can be stored for later enjoyment. To store, place the cooled cupcakes in an airtight container at room temperature for up to 2-3 days. If your kitchen is particularly warm or humid, or if they are topped with whipped cream or a cream cheese frosting, it’s best to store them in the refrigerator. When refrigerated, they can last for up to 4-5 days. Ensure the container is truly airtight to prevent them from drying out and absorbing other odors from the fridge. If stored in the refrigerator, allow them to come to room temperature for about 15-20 minutes before serving for the best flavor and texture.
Freezing angel food cupcakes is also an option. To freeze, place undecorated, completely cooled cupcakes on a baking sheet and freeze until solid (about 1-2 hours). Once frozen, transfer them to a freezer-safe airtight container or heavy-duty freezer bag, separating layers with parchment paper to prevent sticking. They can be stored in the freezer for up to 2-3 months. To thaw, simply remove them from the freezer and let them sit at room temperature for a few hours. Avoid reheating them in the microwave or oven, as this can alter their delicate texture and make them rubbery or dry. Serve at room temperature, adding any desired glaze or toppings after they have fully thawed.
Frequently Asked Questions
What is the difference between angel food cake and other cakes?
The primary difference lies in the ingredients and leavening. Angel food cake uses only egg whites (no yolks or other fats), sugar, flour, and a leavening agent like cream of tartar. It’s leavened almost entirely by the air whipped into the egg whites, resulting in its signature light, fat-free, and airy texture. Most other cakes use whole eggs, butter or oil, and chemical leavening agents like baking powder or soda, leading to a denser, richer crumb.
Can I use all-purpose flour instead of cake flour?
While you can technically use all-purpose flour, it’s highly recommended to use cake flour for angel food cupcakes. Cake flour has a lower protein content than all-purpose flour, which results in a finer, softer, and more tender crumb, essential for the delicate texture of angel food cake. If you absolutely must use all-purpose flour, you can create a substitute by removing 2 tablespoons of all-purpose flour from each cup and replacing it with 2 tablespoons of cornstarch, then sifting it thoroughly.
Why did my angel food cupcakes collapse or become dense?
There are a few common reasons for collapse or density. The most frequent culprits are overmixing the batter after adding the flour, which deflates the whipped egg whites, or under-whipping the egg whites, meaning they didn’t reach stiff enough peaks to support the cake’s structure. Other reasons include opening the oven door too early, baking at too low a temperature, or not inverting the pan (or cupcakes) immediately after baking to allow them to cool properly without deflating.
How can I ensure my egg whites whip properly?
For perfectly whipped egg whites, start with egg whites at room temperature, as they whip to a greater volume. Use a very clean, grease-free bowl (glass or metal is best) and clean beaters. Ensure there is no trace of egg yolk in the whites, as fat will prevent them from whipping. Adding a pinch of salt and cream of tartar helps stabilize the egg whites and achieve stiff, glossy peaks. Beat on medium-high speed, gradually adding sugar, until the peaks hold their shape firmly.