Introduction
Ah, college life. A whirlwind of late-night study sessions, questionable dining hall food, and an eternal quest for something delicious, quick, and budget-friendly. My older brother, bless his heart, navigated those treacherous culinary waters with the ingenuity of a seasoned survivalist. His secret weapon? A legendary snack that became the cornerstone of his collegiate diet: Bacon-Wrapped Cheesy Potato Bites. Forget instant noodles and sad microwave burritos; these savory, crispy, cheesy morsels were his fuel for acing exams, surviving all-nighters, and generally just thriving.
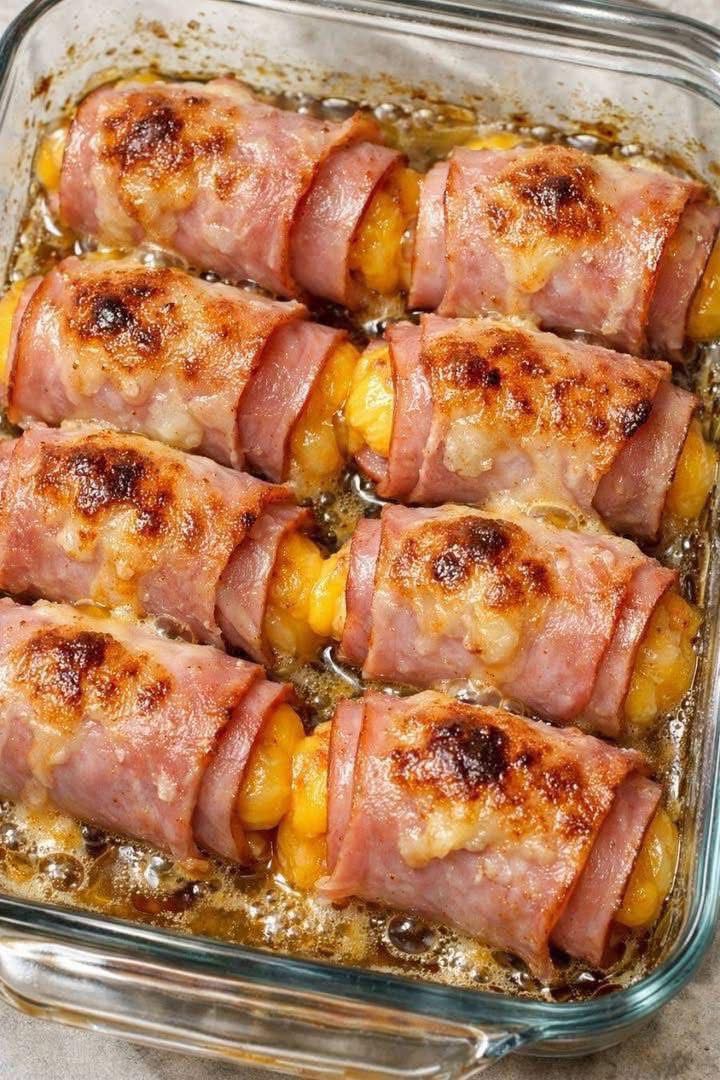
This isn’t just a recipe; it’s a testament to the power of simple ingredients combined in a truly magical way. Imagine tender, fluffy potato cubes, nestled with gooey, melted cheese, all hugged by a crispy, salty strip of bacon. It’s the kind of snack that hits every single craving: salty, savory, cheesy, and utterly satisfying. Easy enough for even the most kitchen-averse student, quick enough to whip up between classes, and versatile enough to be a breakfast, lunch, dinner side, or the ultimate late-night study fuel. My brother swore by them, and honestly, so do I now.
So, get ready to transform your snack game. Whether you’re a college student facing a mountain of textbooks, a busy parent needing a quick after-school bite, or just someone who appreciates the simple joy of bacon, cheese, and potatoes, this recipe is about to become your new best friend. It’s a game-changer, a mood-booster, and quite possibly, the reason my brother graduated with honors (okay, maybe not, but it definitely helped!).
Nutritional Information
Per serving (approximate values, based on 6 servings):
- Calories: 320 kcal
- Protein: 15g
- Carbohydrates: 20g
- Fat: 20g
- Fiber: 2g
- Sodium: 650mg
Ingredients
- 1 pound small potatoes (like Yukon Gold or red potatoes), about 4-5 medium potatoes
- 8 ounces sharp cheddar cheese, cut into 1/2-inch cubes
- 12 slices thin-cut bacon (about 1/2 pound)
- 1 tablespoon olive oil
- 1/2 teaspoon garlic powder
- 1/4 teaspoon onion powder
- 1/4 teaspoon black pepper
- Pinch of salt (optional, bacon is salty)
- Optional: Fresh chives or parsley, chopped, for garnish
Instructions
- Preheat your oven to 400°F (200°C). Line a large baking sheet with parchment paper for easier cleanup. If you’re using a glass baking dish, you can skip the parchment paper, but be prepared for a bit more scrubbing.
- Wash the potatoes thoroughly. You can peel them if you prefer, but leaving the skin on adds nutrients and texture. Cut the potatoes into 1/2-inch to 3/4-inch cubes. Try to keep them relatively uniform in size so they cook evenly.
- Place the cubed potatoes in a microwave-safe bowl with about 1/4 cup of water. Cover the bowl with plastic wrap, leaving a small vent. Microwave on high for 5-7 minutes, or until the potatoes are slightly tender but still firm. Alternatively, you can par-boil them in a pot of salted water for about 5-7 minutes. Drain well and pat dry with a paper towel to remove excess moisture. This step is crucial for ensuring the potatoes are cooked through by the time the bacon is crispy.
- In a medium bowl, toss the par-cooked potatoes with olive oil, garlic powder, onion powder, and black pepper. If you taste a potato and feel it needs more salt, add a small pinch, but remember the bacon will add significant saltiness.
- Take one slice of bacon. Lay it flat on a clean surface. Place one potato cube and one cheese cube together at one end of the bacon slice.
- Carefully wrap the bacon around the potato and cheese, ensuring the cheese is mostly enclosed. You want the bacon to hold the potato and cheese together snugly. If your bacon slices are very long, you might be able to wrap two potato/cheese pairs with one slice, or simply cut the bacon in half. If needed, secure the end of the bacon with a toothpick, though often the bacon will stick to itself as it cooks.
- Arrange the bacon-wrapped bites seam-side down on your prepared baking sheet or in the glass baking dish, ensuring there’s a little space between each one to allow for even cooking and crisping. Don’t overcrowd the pan, as this can steam the bacon rather than crisp it. You may need to use two baking sheets.
- Bake for 20-25 minutes, or until the bacon is crispy and golden brown, and the cheese is melted and bubbly. For extra crispiness, especially on the bacon, you can carefully flip the bites halfway through baking.
- For an even crispier finish, especially if your bacon isn’t as crispy as you’d like, carefully transfer the baking sheet to the top rack of your oven. Turn on the broiler for 2-4 minutes, watching constantly to prevent burning. The bacon can go from perfectly crisp to burnt very quickly under the broiler.
- Carefully remove from the oven. If you used toothpicks, remove them before serving. Let the bites cool for a few minutes before serving, as the cheese will be very hot.
- Garnish with fresh chopped chives or parsley if desired, and serve immediately.
Cooking Tips and Variations
To ensure your Bacon-Wrapped Cheesy Potato Bites are always a resounding success, here are some pro tips and exciting variations to keep things fresh and flavorful. First and foremost, the secret to perfectly cooked potatoes and crispy bacon lies in preparation. Par-cooking your potatoes is non-negotiable; it guarantees they’ll be tender by the time your bacon reaches peak crispiness. If you skip this, you might end up with undercooked potatoes or burnt bacon, neither of which is a desirable outcome. Patting the potatoes dry after par-cooking also helps them crisp up better in the oven. For the bacon, thin-cut bacon is your best friend. It cooks faster and gets much crispier than thick-cut varieties, which can sometimes remain chewy.
When wrapping, try to get the bacon snug around the potato and cheese. If you find the bacon unraveling, a quick fix is to secure it with a wooden toothpick. Just remember to remove all toothpicks before serving! Don’t overcrowd your baking sheet; giving each bite a little breathing room allows the heat to circulate properly, leading to crispier bacon and better melting cheese. If you’re making a large batch, use multiple sheets. Finally, consider finishing them under the broiler for a minute or two. This is where you achieve that ultimate golden-brown, bubbly cheese and extra-crispy bacon, but watch them like a hawk – the broiler can turn perfection into charcoal in seconds.
Now for variations! The beauty of this snack is its adaptability. For a spicy kick, tuck a thin slice of jalapeño or a pinch of red pepper flakes in with the cheese before wrapping. If you love herbs, a sprinkle of fresh rosemary or thyme with the potatoes before baking adds a wonderful aromatic depth. Don’t be afraid to experiment with different cheeses; pepper jack will add more heat, provolone offers a mild, creamy melt, and a smoky gouda can introduce a sophisticated flavor profile. You can even swap out the potatoes for sweet potato chunks for a sweeter, earthier version, or even apple slices for a unique sweet and savory combination that’s surprisingly delicious. For a breakfast twist, serve these alongside a fried or poached egg, letting the runny yolk mingle with the cheesy bacon goodness. A drizzle of maple syrup over the top before serving creates an irresistible sweet and savory dynamic that will have you reaching for more.
Storage and Reheating
These Bacon-Wrapped Cheesy Potato Bites are definitely best enjoyed fresh from the oven, when the bacon is at its crispiest and the cheese is beautifully gooey. However, they store and reheat surprisingly well, making them fantastic for meal prep or enjoying leftovers. To store any uneaten bites, allow them to cool completely to room temperature. This prevents condensation from forming in your storage container, which can lead to sogginess. Once cooled, place them in an airtight container and refrigerate for up to 3-4 days. For longer storage, you can freeze them. Arrange the cooled bites in a single layer on a baking sheet and freeze until solid. Once frozen, transfer them to a freezer-safe bag or container. They will keep well in the freezer for up to 1-2 months. This is an excellent meal prep hack for busy students or anyone who wants quick access to a delicious snack.
When it comes to reheating, avoid the microwave if you want to retain any semblance of crispiness. While a microwave will heat them through, it will inevitably make the bacon soft and the entire bite a bit rubbery. The best way to reheat these bites is in the oven or an air fryer. If using the oven, preheat it to 350°F (175°C). Place the bites on a baking sheet and bake for 10-15 minutes if refrigerated, or 15-20 minutes if frozen (no need to thaw), until they are heated through and the bacon has re-crisped to your liking. Keep an eye on them to prevent burning. If you have an air fryer, this is an even quicker and more efficient method. Set your air fryer to 350°F (175°C) and cook for 5-8 minutes for refrigerated bites, or 8-12 minutes for frozen, shaking the basket halfway through. The air fryer does a fantastic job of bringing back that crispy texture without drying them out. Always ensure the internal temperature reaches 165°F (74°C) for safe consumption, especially if reheating from frozen.
Frequently Asked Questions
What kind of potatoes work best for this recipe?
Small, waxy potatoes like Yukon Gold, red potatoes, or baby potatoes work exceptionally well because they hold their shape nicely when cooked and have a creamy texture. Starchy potatoes like Russets can work, but they tend to be a bit more crumbly. The key is to cut them into uniform 1/2-inch to 3/4-inch cubes to ensure even cooking.
Can I use pre-cooked bacon or bacon bits?
While pre-cooked bacon or bacon bits might seem like a time-saver, they won’t yield the same results. The raw bacon wrapped around the potatoes and cheese cooks and renders its fat, infusing the potatoes with flavor and creating that essential crispy exterior. Bacon bits are too small and dry to wrap, and pre-cooked bacon won’t get as crispy or contribute as much flavor during the baking process. Stick with raw, thin-cut bacon for the best outcome.
What if my bacon isn’t getting crispy enough?
There are a few reasons this might happen. First, ensure you’re using thin-cut bacon; thick-cut takes longer to crisp. Second, don’t overcrowd the baking sheet, as this can cause the bacon to steam instead of crisp. Give each bite space. Third, make sure your oven is at the correct temperature. Finally, if after the initial baking time the bacon still isn’t as crispy as you’d like, a quick 2-4 minute stint under the broiler (watching constantly!) will usually do the trick to achieve that perfect golden-brown crunch.
Can I make these ahead of time for a party?
Absolutely! These are fantastic make-ahead appetizers. You can assemble the bacon-wrapped bites up to 24 hours in advance. Arrange them on a baking sheet (without parchment paper if you plan to bake them on it directly), cover tightly with plastic wrap, and refrigerate. When you’re ready to bake, just pop them in the preheated oven. You might need to add an extra 5-10 minutes to the baking time since they will be cold from the fridge. Alternatively, you can bake them fully, then cool and freeze as described in the storage section, and reheat as needed for your event.