Introduction
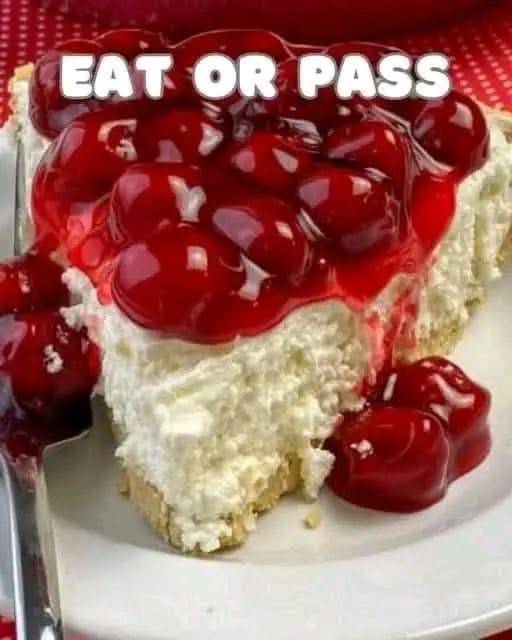
Prepare to be enchanted by the timeless allure of No-Bake Cherry Cheesecake – a dessert that effortlessly combines elegance with irresistible deliciousness. Imagine a vibrant ruby-red cherry topping glistening over a cloud-like, creamy white cheesecake filling, all nestled upon a perfectly crisp, golden-brown crust. This is more than just a dessert; it’s a celebration of textures and flavors, a visual masterpiece that promises a delightful culinary experience with every single bite. The stunning contrast of colors and the promise of sweet, tangy indulgence make this cheesecake an instant showstopper at any gathering, from casual family dinners to festive holiday feasts.
What truly sets this recipe apart, and makes it a cherished favorite for countless home bakers, is the magic word: “no-bake.” Forget the stress of preheating ovens, monitoring baking times, or worrying about cracks in your cheesecake. This brilliant method streamlines the entire process, making it incredibly accessible for even novice cooks. It’s the perfect solution for those scorching summer days when turning on the oven is unthinkable, yet you crave a decadent treat. The no-bake approach ensures a consistently smooth and rich filling, allowing the vibrant flavors of cream cheese and cherry to truly shine without the fuss. It’s quick to assemble, requires minimal equipment, and delivers maximum flavor impact, proving that sometimes the simplest methods yield the most spectacular results.
This classic No-Bake Cherry Cheesecake is a testament to comfort and joy, a dessert that evokes nostalgic memories and creates new ones. Its crowd-pleasing nature is undeniable; who can resist a slice of creamy cheesecake topped with sweet, juicy cherries? In this comprehensive guide, you’ll discover everything you need to create your own perfect masterpiece, from selecting the finest ingredients to mastering the simple step-by-step assembly. We’ll delve into the secrets behind its luscious texture, explore clever variations, and provide all the tips and tricks to ensure your no-bake cherry cheesecake is a resounding success, leaving everyone asking for the recipe.
Nutritional Information
Per serving (approximate values):
- Calories: 420
- Protein: 7g
- Carbohydrates: 48g
- Fat: 25g
- Fiber: 2g
- Sodium: 280mg
Ingredients
For the Crust:
- 1 ½ cups (about 15-18 full sheets) graham cracker crumbs
- ¼ cup granulated sugar
- ½ cup (1 stick) unsalted butter, melted
For the Cheesecake Filling:
- 2 (8-ounce) packages full-fat cream cheese, softened to room temperature
- 1 cup granulated sugar
- 1 teaspoon pure vanilla extract
- 1 (8-ounce) container frozen whipped topping (like Cool Whip), thawed, or 2 cups heavy cream, whipped to stiff peaks
For the Cherry Topping:
- 1 (21-ounce) can cherry pie filling
Instructions
- Prepare the Perfect Crust:
- Begin by preparing your crust. If you’re starting with whole graham crackers, place them in a food processor and pulse until finely ground into crumbs. Alternatively, place them in a sturdy zip-top bag and crush them with a rolling pin until fine.
- In a medium bowl, combine the graham cracker crumbs and ¼ cup granulated sugar. Mix well to ensure the sugar is evenly distributed.
- Pour the ½ cup of melted unsalted butter over the crumb mixture. Stir with a fork until all the crumbs are moistened and resemble wet sand.
- Press the crumb mixture firmly and evenly into the bottom of a 9-inch pie plate or a 9-inch springform pan. Use the back of a spoon or the bottom of a flat-bottomed glass to compact the crust as tightly as possible. This is crucial for a firm base.
- Place the crust in the refrigerator to chill for at least 30 minutes while you prepare the filling. This helps the butter solidify and the crust to set, preventing it from crumbling when sliced.
- Create the Creamy Filling:
- In a large mixing bowl, using an electric mixer (stand mixer with paddle attachment or a hand mixer), beat the softened full-fat cream cheese on medium speed until it is light, fluffy, and completely smooth, with no lumps. This usually takes 2-3 minutes. Ensure the cream cheese is at room temperature; cold cream cheese will result in a lumpy filling.
- Gradually add the 1 cup of granulated sugar to the cream cheese, beating on medium-low speed until well incorporated and smooth. Scrape down the sides of the bowl as needed to ensure everything is mixed evenly.
- Beat in the pure vanilla extract until just combined.
- If using thawed whipped topping: Gently fold the entire 8-ounce container of thawed whipped topping into the cream cheese mixture using a spatula. Fold until no streaks of whipped topping remain and the filling is uniform and airy. Be careful not to overmix, as this can deflate the whipped topping.
- If using homemade whipped cream: In a separate, clean bowl, whip 2 cups of cold heavy cream until stiff peaks form. Gently fold this whipped cream into the cream cheese mixture until just combined. Again, avoid overmixing.
- Pour the creamy cheesecake filling over the chilled graham cracker crust. Use an offset spatula or the back of a spoon to spread the filling evenly across the crust, creating a smooth top.
- Add the Luscious Topping:
- Carefully open the can of cherry pie filling. Spoon the cherry pie filling evenly over the top of the cheesecake filling. You can spread it gently to cover the surface or leave it slightly mounded for a more rustic look. Ensure the cherries are distributed well.
- Chill to Perfection:
- Cover the cheesecake loosely with plastic wrap or aluminum foil.
- Refrigerate the cheesecake for a minimum of 4-6 hours, but ideally overnight (8 hours or more). This extended chilling time is absolutely essential for the cheesecake to firm up properly and achieve its characteristic sliceable texture. Do not rush this step!
- Once thoroughly chilled and set, remove the cheesecake from the refrigerator. If using a springform pan, carefully release the sides. If using a pie plate, slice and serve directly from the plate.
- For neat slices, use a sharp knife that has been run under hot water and wiped clean between each cut.
Cooking Tips and Variations
To achieve the absolute best texture for your cheesecake filling, always ensure your full-fat cream cheese is completely at room temperature before you begin mixing. This allows it to whip up smoothly and incorporate fully without lumps, leading to that luxurious, velvety consistency we all crave. Another critical tip is to avoid overmixing the filling, especially once you’ve folded in the whipped topping or whipped cream. Overmixing can deflate the air incorporated, resulting in a denser, less airy cheesecake. Mix until just combined and smooth. Finally, the most important “cooking” step for a no-bake cheesecake is the chilling time. A minimum of 4-6 hours is necessary for it to set properly, but for an impeccably firm and sliceable cheesecake, an overnight chill (8+ hours) is highly recommended. Patience here will be greatly rewarded!
The beauty of this No-Bake Cherry Cheesecake lies in its versatility. You can easily customize the crust: try using crushed Oreo cookies for a chocolatey base, shortbread cookies for a buttery European flair, or even ginger snaps for a hint of spice. If cherries aren’t your favorite, the possibilities for fruit toppings are endless. Substitute with canned blueberry, strawberry, or even mixed berry pie filling. For a fresh and vibrant alternative, prepare a simple sauce with fresh or frozen berries, sugar, and a touch of cornstarch to thicken. You can also elevate the cheesecake filling itself by adding citrus zest (lemon or orange) for a bright note, or a different extract like almond extract for a subtle nutty flavor. For individual servings, press the crust into the bottom of muffin tins lined with paper liners, fill with the cheesecake mixture, top with cherries, and chill – perfect for parties! Garnish your finished cheesecake with a sprig of fresh mint, a sprinkle of chocolate shavings, or a dusting of powdered sugar for an elegant touch. Serving a slice with a small scoop of vanilla bean ice cream or a dollop of extra whipped cream takes it to another level of indulgence.
Storage and Reheating
This No-Bake Cherry Cheesecake stores beautifully in the refrigerator. Once chilled and set, cover any remaining portions tightly with plastic wrap or aluminum foil to prevent it from absorbing odors from other foods and to keep it fresh. Stored properly, the cheesecake will remain delicious for 3-5 days in the refrigerator. It’s best to keep the topping on the cheesecake during storage, as it helps to seal in moisture.
For longer storage, this cheesecake can be frozen. To freeze, first ensure the cheesecake is fully chilled and set. If it’s in a springform pan, remove the sides. You can freeze the entire cheesecake or individual slices. Wrap the cheesecake tightly in several layers of plastic wrap, followed by a layer of aluminum foil, to prevent freezer burn. It can be stored in the freezer for up to 1 month. To thaw, transfer the frozen cheesecake to the refrigerator and allow it to thaw slowly overnight or for at least 8 hours. Do not try to thaw it at room temperature, as this can affect the texture. There is no reheating necessary, as this is a dessert best served cold directly from the refrigerator.
Frequently Asked Questions
Can I use fresh cherries instead of canned pie filling?
Absolutely! For a fresh cherry topping, you’ll need to pit and halve about 3-4 cups of fresh cherries. You can then simmer them with a little sugar, lemon juice, and a cornstarch slurry (cornstarch mixed with a small amount of cold water) until the sauce thickens. Allow it to cool completely before spreading it over the cheesecake.
My cheesecake filling seems too runny. What went wrong?
The most common reasons for a runny filling are using low-fat or fat-free cream cheese (full-fat is essential for structure), not softening the cream cheese enough (leading to lumps and poor emulsification), or not chilling the cheesecake for long enough. Ensure you’re using full-fat cream cheese, that it’s at room temperature, and allow at least 4-6 hours of chilling, preferably overnight.
Can I make this cheesecake ahead of time for a party?
Yes, this No-Bake Cherry Cheesecake is an excellent make-ahead dessert! In fact, making it the day before you plan to serve it is ideal, as it allows plenty of time for the cheesecake to firm up perfectly in the refrigerator. This also frees up your time on the day of your event.